I recently noticed that the Caddy Docker image I’d been using — abiosoft/caddy — is no longer maintained. So I went ahead and upgraded from Caddy v1 to v2 using the official image, and also got the Cloudflare plugin sorted out. This way I can turn on Cloudflare’s proxy feature to hide my real IP (though if you hadn’t enabled it before, there’s an 87% chance it’s already been logged somewhere like Shodan).
ACME challenges
You can’t just flip on Cloudflare’s proxy (the orange cloud toggle in DNS settings) without some extra work. It comes down to ACME challenges. There are three types:
- HTTP challenge (Default)
- The CA (e.g. Let’s Encrypt) visits a special directory on the server that the domain points to. If it finds the expected content, it issues the certificate. Only works over HTTP (port 80) or HTTP redirected to HTTPS (port 443).
- TLS-ALPN challenge (Default)
- The CA connects to port 443 via TLS and exchanges specific values during the handshake. If the CA gets the expected values, it issues the certificate. Not really practical for most of us.
- DNS challenge
- Verifies that a specific TXT record exists in the domain’s DNS.
All three exist to make sure the certificate goes to someone who actually controls the domain, not to a malicious actor. That’s why HTTP challenge doesn’t allow ports other than 80 — ports above 1024 can be listened on by any unprivileged user.
Now let’s look at Cloudflare Proxy’s SSL/TLS settings:
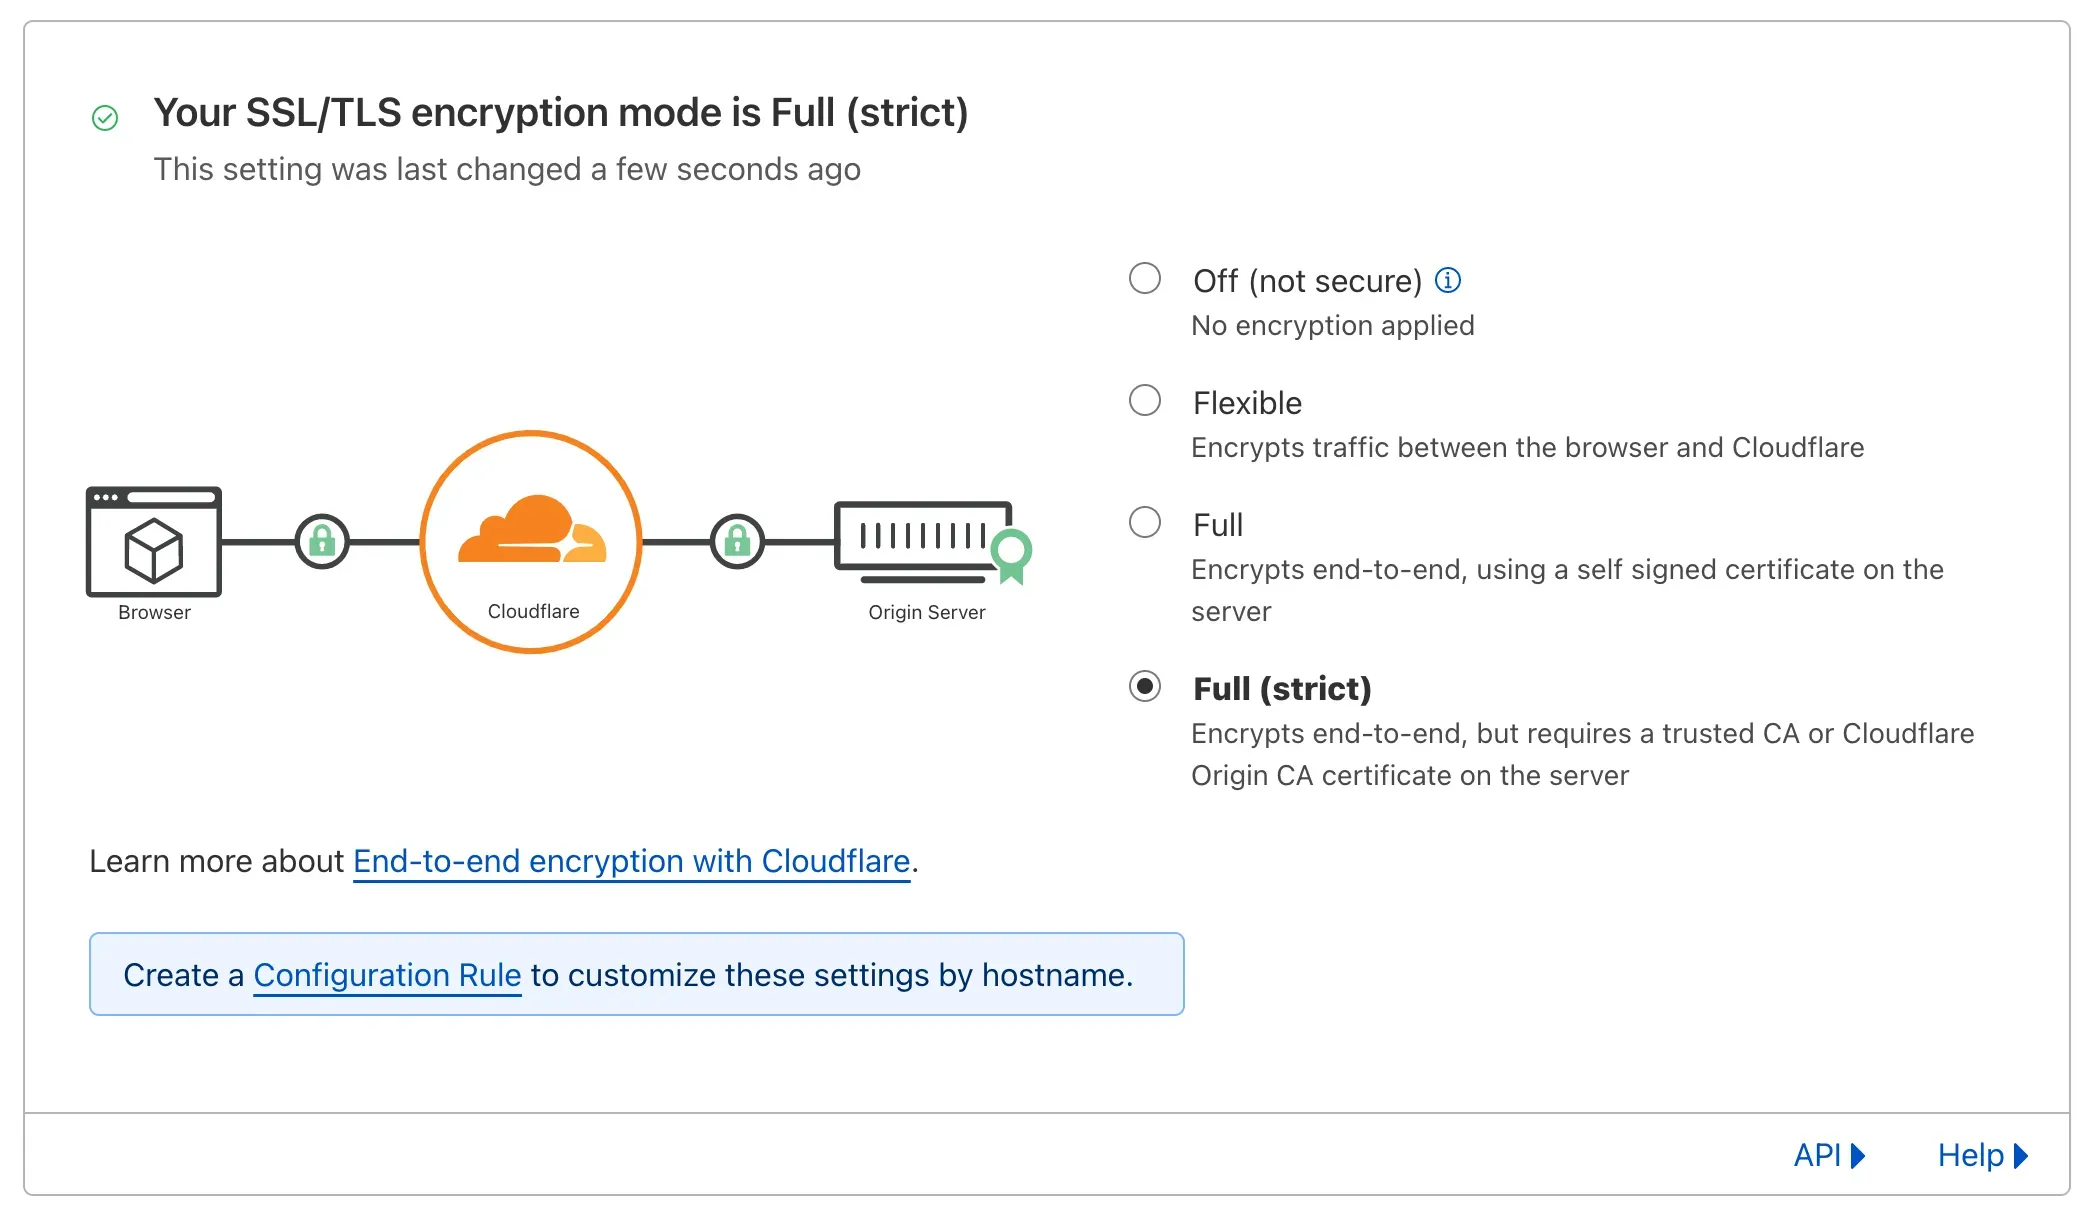
If you’ve selected Full or Full (strict) mode, Cloudflare only connects to HTTPS sites. This breaks HTTP challenge validation because there’s no valid certificate on the server yet.
Here are your options:
- Use DNS challenge — proxy status doesn’t matter.
- Before the certificate is issued, set proxy mode to Off (or DNS-only / grey cloud) or Flexible, then switch to Full (strict) after issuance. Switching to Full (strict) prevents an infinite redirect loop1, and Caddy can then renew the certificate over HTTPS2.
- Set proxy mode to Full and use a self-signed certificate in Caddy. After issuance, switch to Full (strict).
Note: TLS-ALPN challenge won’t work because Cloudflare’s proxy sits between your server and the CA.
Building Caddy with the Cloudflare plugin
The official image doesn’t ship with the Cloudflare module, so you need to build the binary yourself. Here’s the Dockerfile:
FROM caddy:builder AS builder
RUN xcaddy build --with github.com/caddy-dns/cloudflare

FROM caddy:latest
COPY --from=builder /usr/bin/caddy /usr/bin/caddy
This uses a multi-stage build. For more info, see: tachingchen.com
Caddyfile v1 to v2
A v1 Caddyfile for proxying might look like this:
example.com {
  tls me@ujoj.cc
  gzip
  reverse_proxy / localhost:1234 {
    transparent
  }
}
Per the Caddy Docs, a few things changed in v2:
proxybecamereverse_proxy, andreverse_proxyincludes thetransparentbehavior by defaultgzipis nowencode gzip(addencodebefore it)- The serving path behavior changed — using just
/only matches the exact/path. You need*or no path at all.
The updated Caddyfile looks like this:
example.com {
    tls me@ujoj.cc
    encode gzip
    reverse_proxy * localhost:1234
}
or
example.com {
    tls me@ujoj.cc
    encode gzip
    reverse_proxy localhost:1234
}
TLS DNS challenge
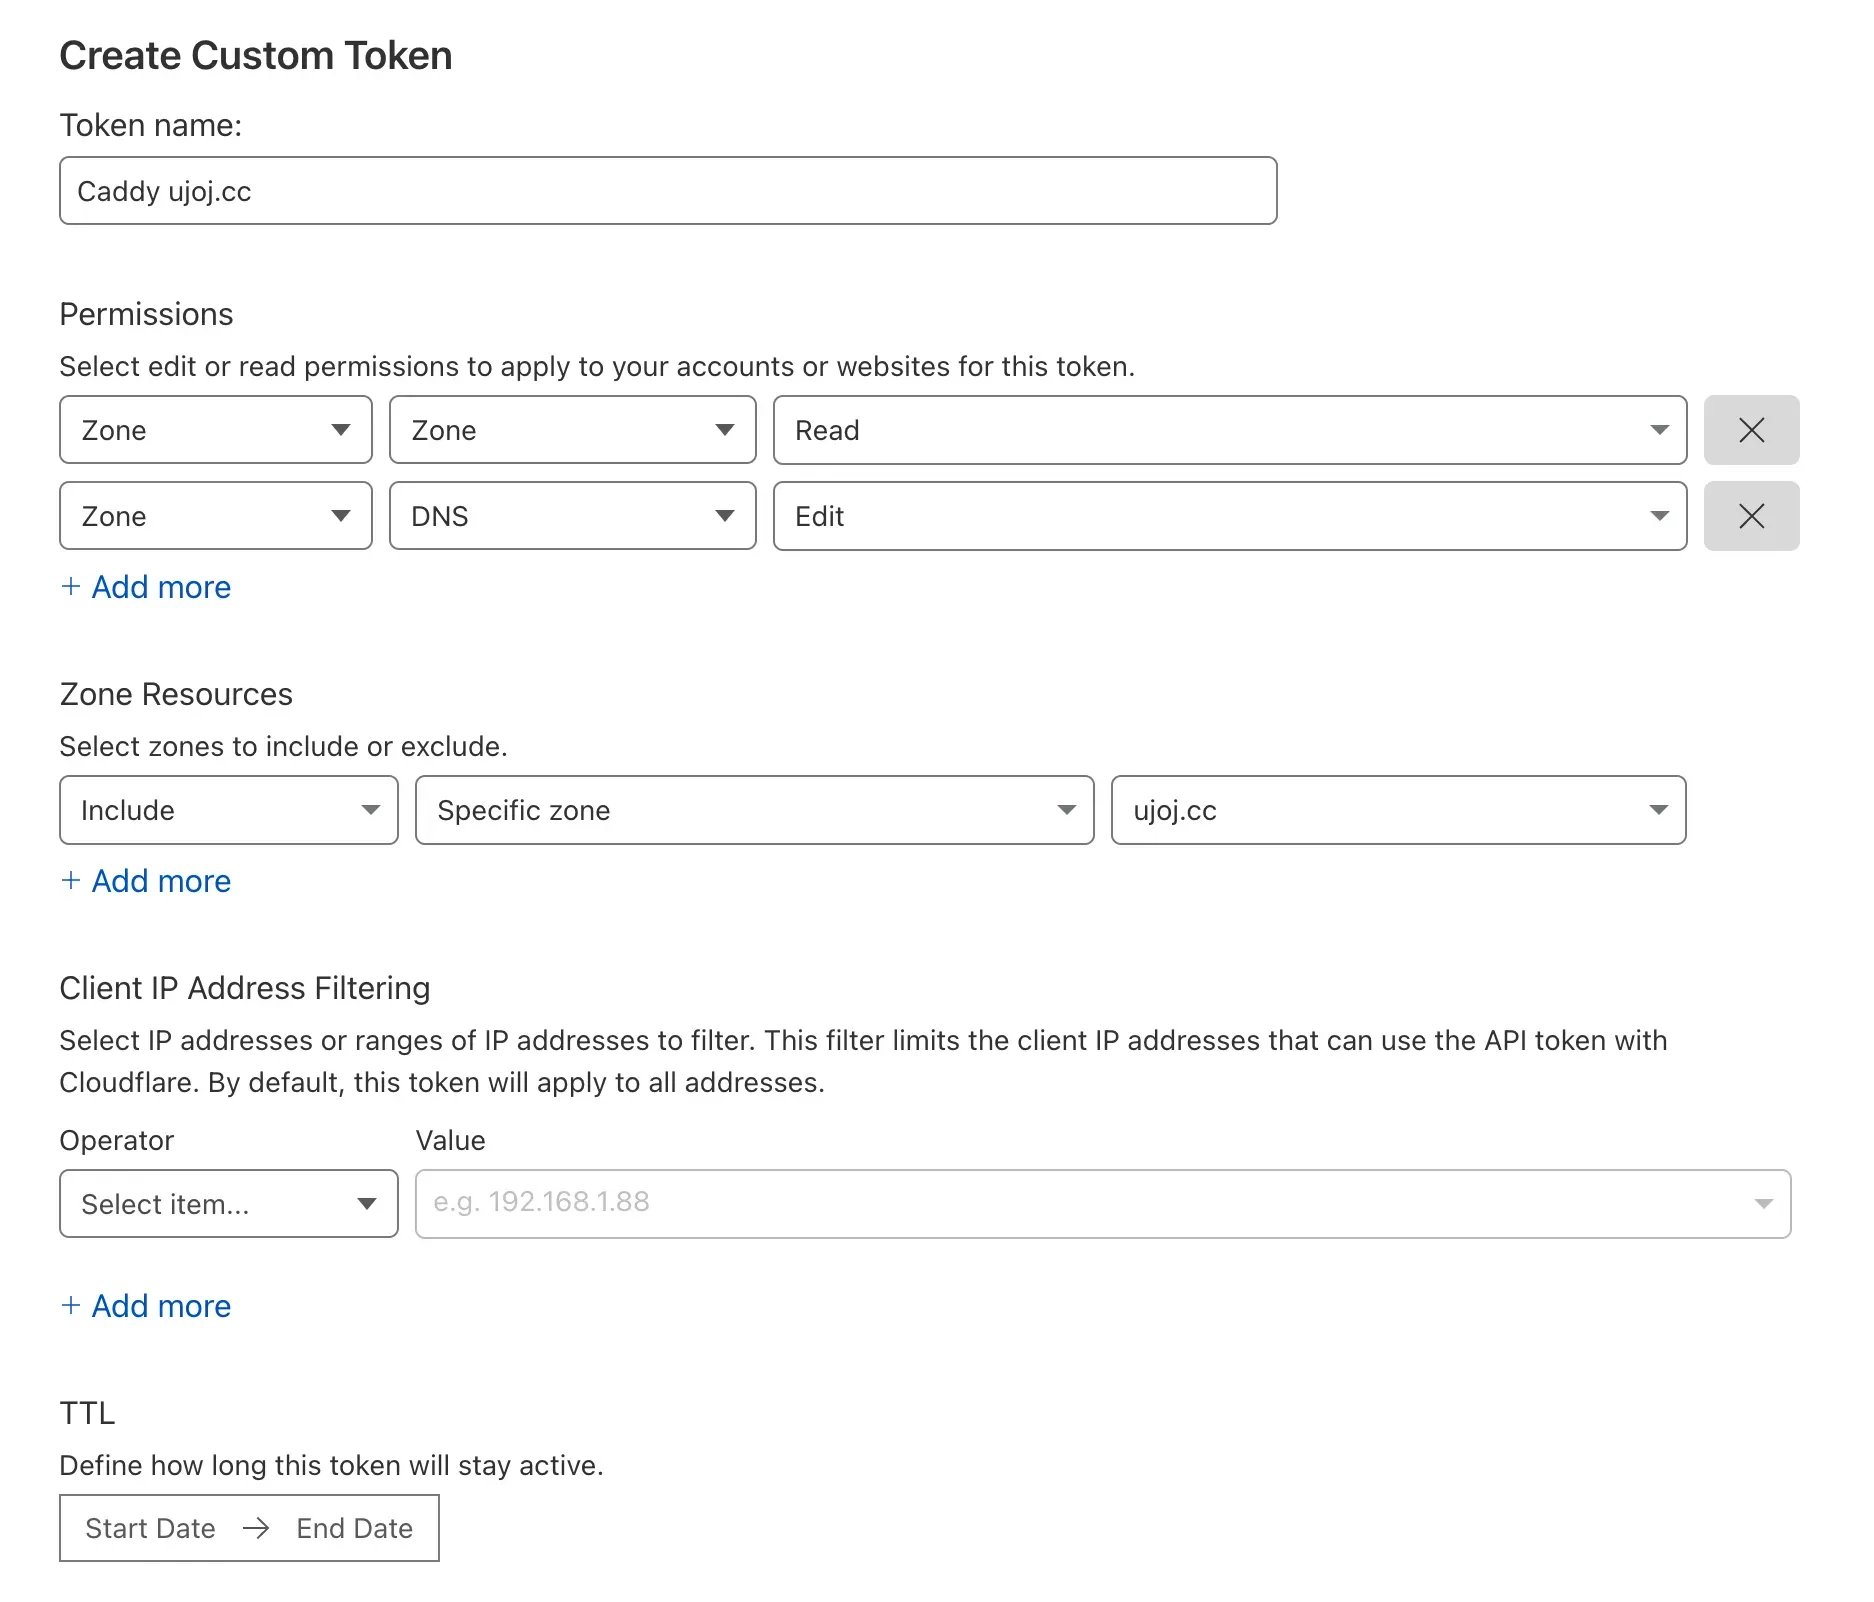
First, grab an API token from https://dash.cloudflare.com/profile/api-tokens. Here’s what my token settings look like:
To use DNS Challenge as mentioned above, add:
tls {
    dns cloudflare {your_cloudflare_API_token}
}
The full Caddyfile becomes:
example.com {
    tls {
        dns cloudflare {your_cloudflare_API_token}
    }
    encode gzip
    reverse_proxy localhost:1234
}
Or to set Cloudflare DNS Challenge globally:
{
    email me@ujoj.cc
    acme_dns cloudflare {your_cloudflare_API_token}
}
example.com {
    encode gzip
    reverse_proxy localhost:1234
}
Ref:
- https://caddyserver.com/docs/automatic-https
- https://letsencrypt.org/zh-tw/docs/challenge-types/
- https://caddy.community/t/letsencrypt-error-when-caddy-is-behind-cloudflare/14100/
- https://caddyserver.com/docs/v2-upgrade
- https://acytoo.com/ladder/set-caddy-cloudflare-cdn/
If proxy is set to Flexible, when users connect via HTTPS, Cloudflare tries to reach your server over HTTP. But once the certificate is in place, Caddy auto-redirects HTTP to HTTPS — hello redirect loop. See: Cloudflare Docs Cloudflare Guide ↩︎
Because the server already has a valid certificate at this point. ↩︎